Get Started with React Native
Setup and Run your first react native application

Requirements for launching your initial React Native application
Install Android SDK
- Refer to the React Native documentation to determine the necessary SDK version and dependencies to install

The following must be installed
Under Android 12 (S)
Android SDK Platform 31Intel x86 Atom_64 System ImageorGoogle APIs Intel x86 Atom System Imageor (for Apple M1 Silicon)Google APIs ARM 64 v8a System Image
Under SDK Build tools
31.0.0
Procedures for installing the listed requirements:
Launch Android Studio and select "SDK Manager" from the drop-down menu as illustrated

Now select the required options under android 12 (S) as shown below


Go to SDK Tools and select 31.0.0

Next, click "Apply" and wait until the installation is complete
Ensure you have either an Android simulator installed or a physical device(mobile phone)
NOTE: If you opt to use a physical device, skip the following 4 steps (recommended especially if your machine has lower specs)
Select "Virtual Device Manager" as shown and then click "Create Device"

Choose any of the listed devices and click "Next"

Download the Android S and then click next

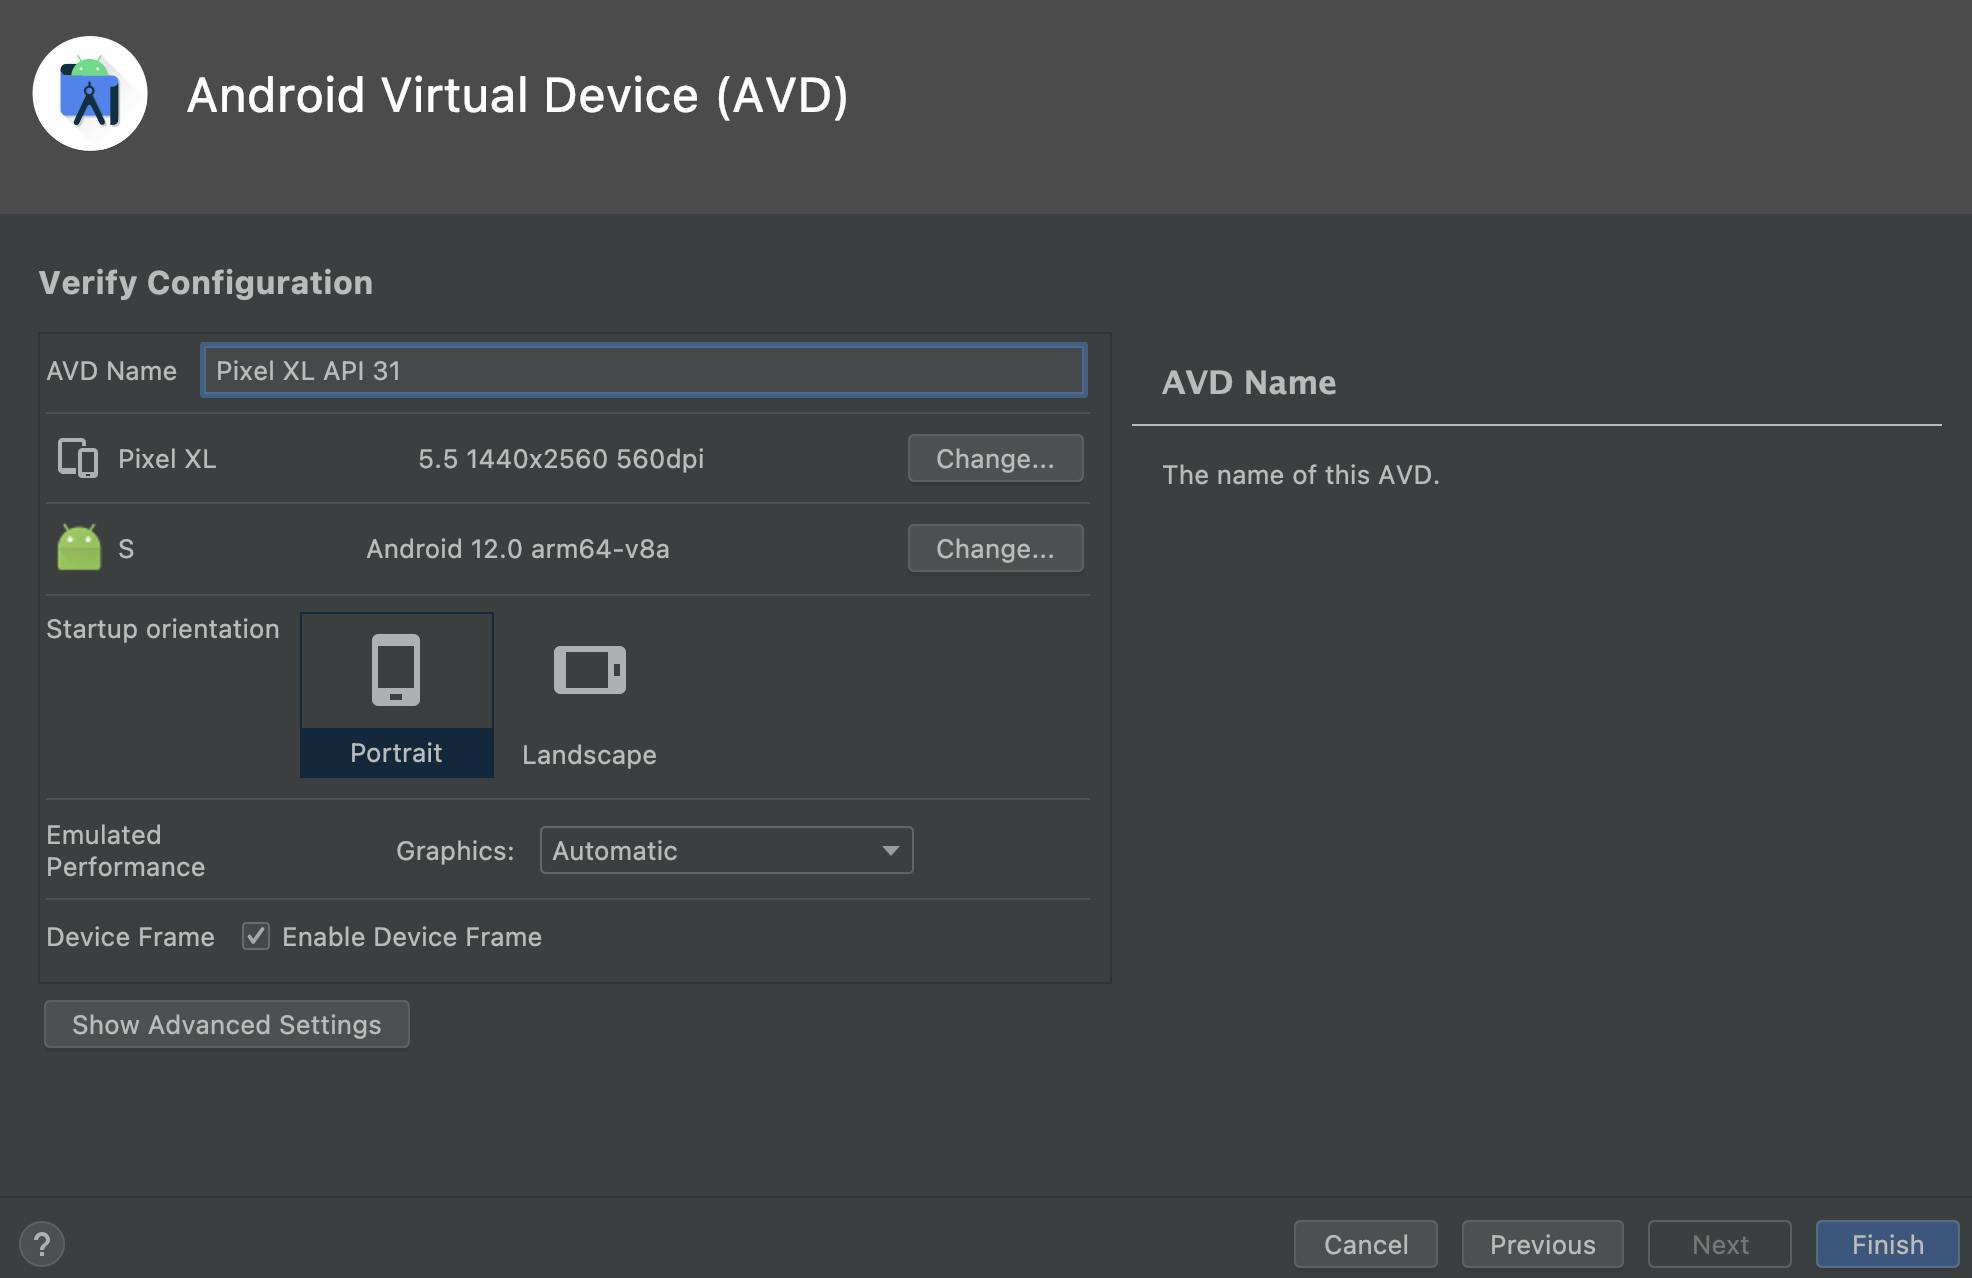
Finally, click "Finish" on the next window and wait until the installation is complete
Configuring the ANDROID_HOME environment variable
The React Native tools require specific environment variables to be established in order to construct applications with native code
Open the Windows Control Panel.
Click on User Accounts, then click User Accounts again
Click on Change my environment variables
Click on New... to create a new
ANDROID_HOMEuser variable that points to the path to your Android SDK:

The SDK is installed, by default, at the following location:
%LOCALAPPDATA%\Android\Sdk
You can locate the actual location of the SDK in the Android Studio "Settings" dialog under the path: Appearance & Behavior → System Settings → Android SDK
Then,
Open a new Command Prompt window to ensure the new environment variable is loaded before proceeding to the next step.
Open PowerShell
Copy and paste Get-ChildItem -Path Env:\ into PowerShell
Verify
ANDROID_HOMEhas been added
4. Add platform-tools to Path
Open the Windows Control Panel.
Click on User Accounts, then click User Accounts again
Click on Change my environment variables
Select the Path variable.
Click Edit.
Click New and add the path to platform tools to the list.
The default location for this folder is:
%LOCALAPPDATA%\Android\Sdk\platform-tools
Verify that the simulator or physical device is connected to the system
Ensure that in the physical device, Developer mode is enabled and under Developer mode, USB Debugging is turned on, and the Default USB Configuration is set to File Transfer (refer to this article for clarification
Enter the command
adb devicesYou will find the simulator if installed and the physical device if connected

Potential errors that may occur:
Ruby version is outdated
Error: Installing Bundler, Ruby version 2.6.10, but Gemfile specified 2.7.6
To resolve the error, enter the following commands in the terminal
brew install rbenv ruby-buildrbenv install 2.7.6rbenv global 2.7.6Check the Ruby version by entering
ruby -vin the terminalIf the latest Ruby version is not displayed, enter the following command
rbenv shell 2.7.5still having issues. refer this article
Creating your first react-native application
Enter the following command in the terminal where you need to create the application:
npx react-native init AwesomeProjectnpx is node package execute
react-native is your package name
init for initialization for the project
AwesomeProject is the project name
The installation process may take a while, so please wait until it is finished

Running your react-native application
1. Starting Metro:
Metro is a JavaScript bundler that combines an entry file and various options to produce a single JavaScript file that encompasses all code and dependencies
Navigate to your project folder and execute the following command to start Metro
npx react-native start
2. Starting your application :
- Run the following commands
npx react-native run-android

voila…..!

